
How to Embed a Chatbot on Your Website in 5 Minutes
You do not need a custom integration to put a chatbot on your website. HolderChat uses one official script tag. A working example is already running in the bottom-right corner of holderchat.com — open it and ask a question. This is the short path from a new account to a visible widget. The complete reference is in Embedding the Chatbot Widget.
A note on timing, so the title does not overpromise: copying and pasting the snippet takes a minute. Creating the bot is also short. Rebuilding the knowledge base can take several minutes, depending on how much content you add.
HolderChat is free. You can create an account and use the product without a credit card; paid plans and checkout are not offered at this time. See Free access.
What you need
- A HolderChat account. The steps are in Account Registration and Login.
- Something for the bot to read: your website URL, or a file in PDF, DOCX, TXT, MD, XLSX, or PPTX format.
- A way to add one script tag before the closing
</body>tag. If your site is WordPress, you can skip the snippet and use the HolderChat Connector plugin instead.
1. Create your chatbot
Register or log in, then open the Dashboard. If you have no bots yet, click Create Your First Chatbot. If you already have bots, use the create action on the dashboard. HolderChat creates an empty bot and opens the Edit Chatbot page. The full create flow is in Creating Your First Chatbot.
2. Add knowledge and wait until the status is Active
An empty bot cannot answer until it has knowledge behind it. In the left sidebar, open Knowledge Sources and add at least one source: Add Website (enter the URL, review the menu preview, and start parsing), Upload File, or Add Extern for an external JSON API.
After you add or change sources, a yellow Changes detected banner appears. Click Rebuild Bot and wait until the status shows Active. That wait can take several minutes. Details are in Knowledge Sources.
3. Set the greeting and the look (optional)
Open Bot Behavior & Messages to set the bot name and welcome text, then click Save Changes. Message-only changes do not need a rebuild. See Bot Behavior and Messages.
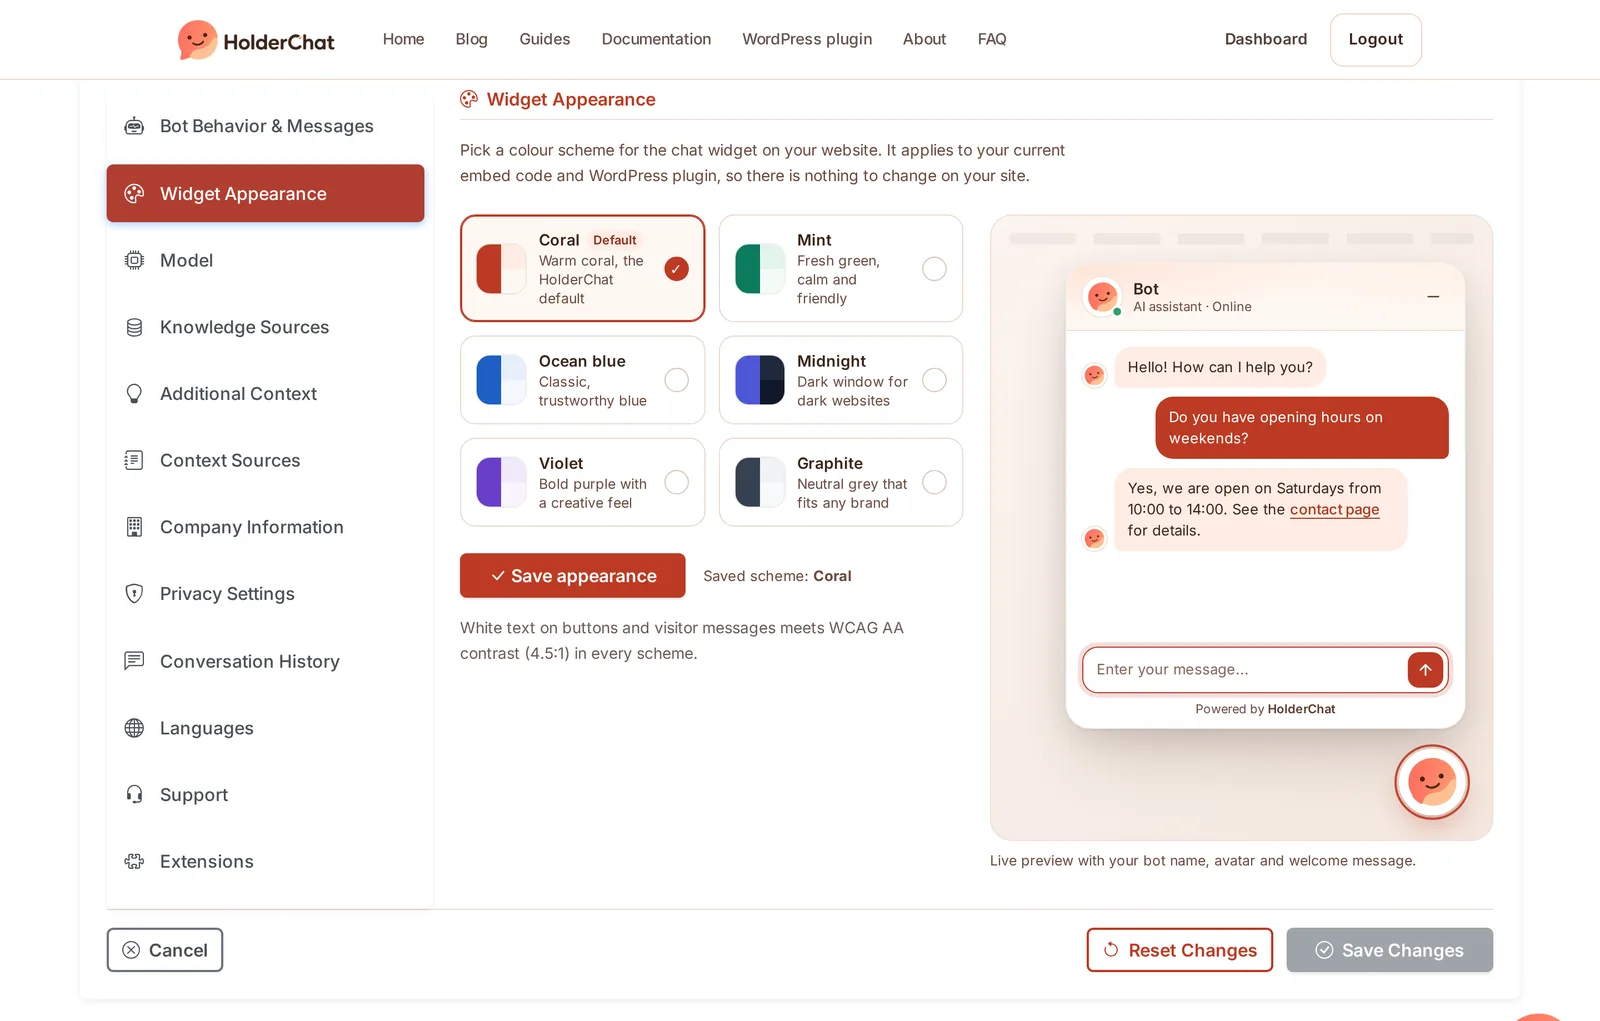
To change the colours of the chat window, open the Widget Appearance tab. There are six schemes: Coral (the default), Mint, Ocean blue, Midnight, Violet, and Graphite. In the same tab you can also build the launcher button (icon library or upload, size, offsets, hover and entrance animation, optional teaser bubble, and delayed load). A live preview shows your bot name, avatar, welcome message, and button. Click Save appearance. The scheme and launcher settings are stored for that bot and apply to both official embed methods and to the WordPress plugin, so you do not need to change the snippet on your site. See Launcher button builder.
4. Copy the embed snippet
Once the bot is Active, open Widget Appearance on that bot. You can copy either official snippet there. You can also open Dashboard → Get Code, or Get Widget Code with the bot selected, for the script tag. The script embed is the official documented form below, with a placeholder instead of your token:
<script src="https://holderchat.com/dynamic/get.js?token=YOUR_TOKEN" async defer></script>There is also an iframe embed, which looks the same and is required if you want custom CSS or JavaScript (those fields run only inside the isolated frame, never on the script embed or on the host page):
<script src="https://holderchat.com/dynamic/iframe.js?token=YOUR_TOKEN" async></script>The iframe snippet is a small loader, not a bare <iframe> tag, so it can resize the frame between the closed button and the open chat. The frame is sandboxed without allow-same-origin. Use only one method on a given page. Full steps and the security model are in Embedding the Chatbot Widget and Custom CSS and JavaScript.
Replace YOUR_TOKEN with the token from your own dashboard. The token is tied to one bot; do not reuse it on a different bot.
The async and defer attributes tell the browser it can download the script without blocking the rest of the page. They are described in the MDN documentation for the HTML script element, including async and defer. If the snippet you copy from the dashboard does not include them, add them as shown above before you paste the tag into your site.
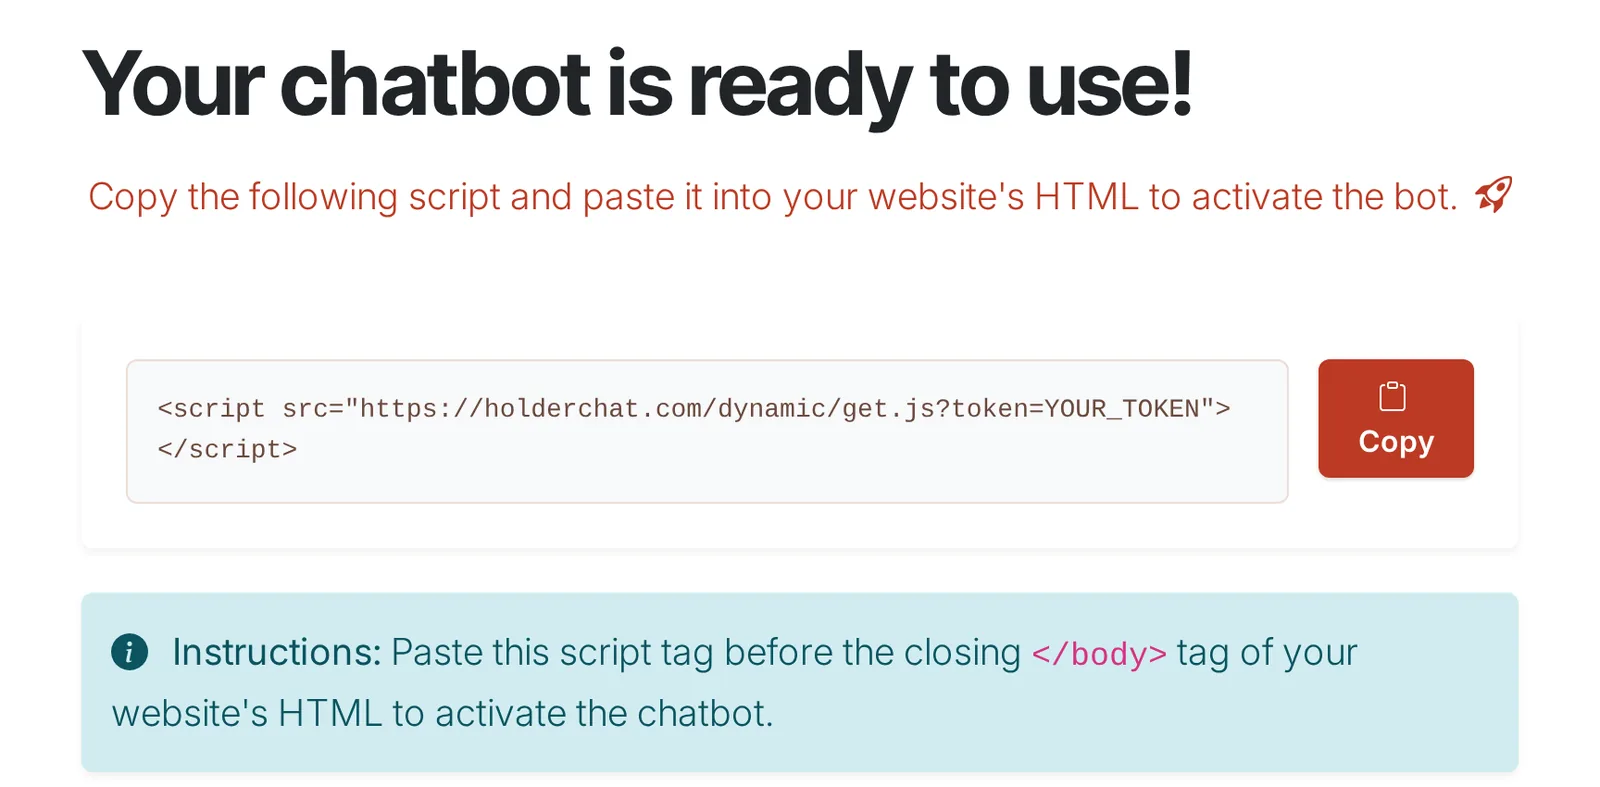
Paste the tag before the closing </body> tag on every page where the chat should appear. Embedding the widget does not trigger a rebuild, and the token stays valid while the bot is Active.
5. Check it, and compare with the live example
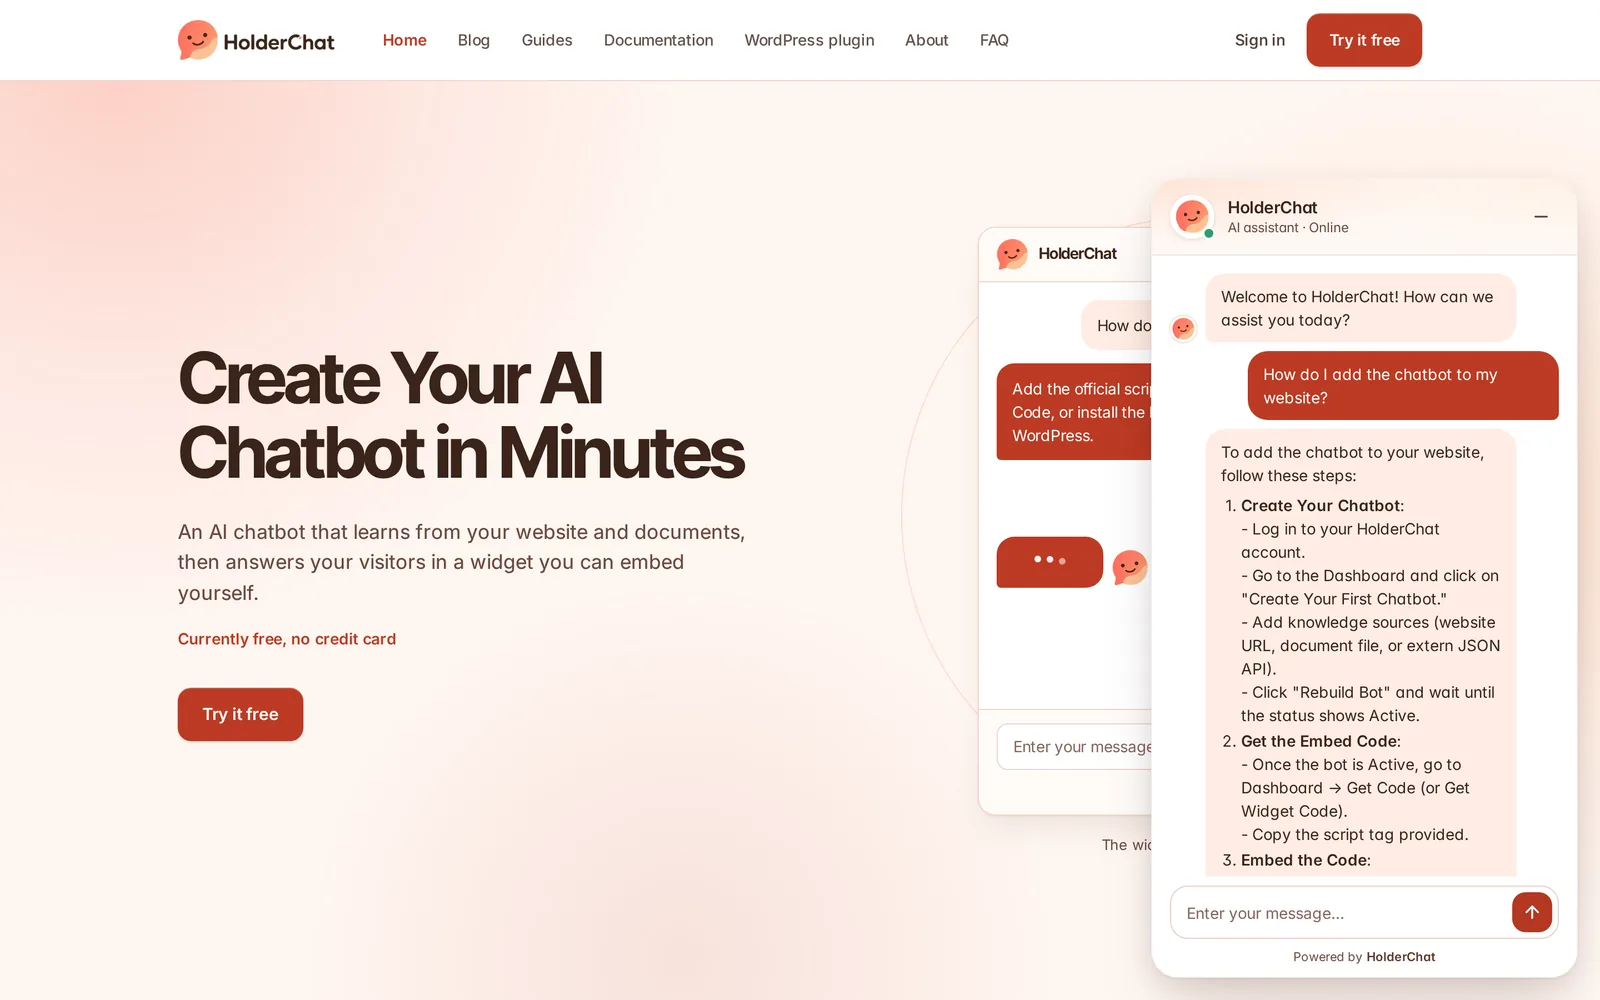
Open your website in an incognito window. The chat bubble should appear, usually in a bottom corner. Send a test message. For a reference of the finished widget, open holderchat.com and use the bubble in the bottom-right corner — that is the same official widget, running on this site.
If the bubble is missing, check the script placement, confirm the bot status is Active, and look at the browser console for errors. The site must allow third-party scripts. If you use a Content-Security-Policy, it must allow scripts from holderchat.com and a WebSocket connection (wss://). Some ad blockers hide chat widgets. A short test plan is in Testing Your Chatbot; troubleshooting and the widget cookies are in the embedding documentation.
On WordPress, you can skip the snippet
If your content already lives in WordPress, the HolderChat Connector can create the bot, sync the pages you select, and inject the widget for you. In WP Admin go to HolderChat → Setup and click Create Chatbot, then in HolderChat → Settings enable Show chat widget on frontend and save. The plugin injects get.js automatically.
WordPress documents how to install and manage plugins. The HolderChat-specific steps are on the WordPress plugin page and in WordPress Connector Setup.
- The bot status is Active, with at least one knowledge source attached.
- The official script tag is in the page, or the WordPress plugin is showing the widget.
- The bubble appears in an incognito window and answers a question from your own content.
Frequently asked questions
Do I need to write code to embed a chatbot?
Not if you use the HolderChat Connector plugin. On any other site you add one official script tag, with the token from Get Widget Code.
Where should I paste the script tag?
Paste it before the closing </body> tag on every page where the chat should appear. That is what the Get Widget Code screen and the embedding documentation both describe.
Why is the chat bubble not showing?
The usual causes are a missing script, the wrong token, or a bot that is not yet Active. Check those first, then disable any ad blocker and look at the browser console. If your site has a strict Content-Security-Policy, allow scripts from holderchat.com and a wss:// WebSocket.
Can I change the widget colours after I embed it?
Yes. Open Widget Appearance in the dashboard, choose one of the six colour schemes, and click Save appearance. The change applies to your current embed code and to the WordPress plugin, so you do not need to edit your site again.
Does pasting the snippet rebuild the bot?
No. Embedding does not trigger a rebuild, and the token stays valid while the bot is Active. You only need to rebuild after you add or change knowledge sources.
Add the widget to your site
Create a bot, wait until it is Active, then paste an official script or iframe snippet — or let the WordPress plugin inject the script embed. After launch, cover the questions visitors ask first; that list is in 5 Questions Your Website Chatbot Should Answer From Day One. If the bot is mainly for support, use the customer support chatbot guide. Other walkthroughs are in HolderChat Guides and the HolderChat blog.